Sending Email In C# & .NET - Part 5 - Using Google Cloud API
[C#, .NET, Email, Google Cloud]
This is Part 5 of a series on sending email.
- Sending Email in C# & .NET - Part 1 - Introduction
- Sending Email in C# & .NET - Part 2 - Delivery
- Sending Email in C# & .NET - Part 3 - Using Gmail
- Sending Email In C# & .NET - Part 4 - Using Office 365 & MS Graph API
- Sending Email In C# & .NET - Part 5 - Using Google Cloud API (This Post)
- Sending Email In C# & .NET - Part 6 - Testing SMTP Locally Using PaperCut
- Sending Email In C# & .NET - Part 7 - Sending Inline Images Using SMTP
- Sending Email In C# & .NET - Part 8 - Sending HTML Email Using SMTP
- Sending Email In C# & .NET - Part 9 - Sending Multiple Format Email Using SMTP
- Sending Email In C# & .NET - Part 10 - Sending Plain Text Email Using MailKit
- Sending Email In C# & .NET - Part 11 - Sending HTML Email Using MailKit
- Sending Email In C# & .NET - Part 12 - Sending Email With Attachments Using MailKit
- Sending Email In C# & .NET - Part 13 - Sending Email With Inline Attachments Using MailKit
- Sending Email In C# & .NET - Part 14 - Sending Multiple Format Email Using MailKit
- Sending Email In C# & .NET - Part 15 - Sending Calendar Invites Using MailKit
- Sending Email In C# & .NET - Part 16 - Testing SMTP Locally Using Mailpit
In our previous post, we explored how to create and configure an application on Azure to send email and how to utilize the Microsoft Graph API for email sending.
In an earlier post, we had looked at how to use the SmtpClient to send email using the Google SMTP server.
In this post, we will look at how to use the Google Cloud API to send email.
The first step is to create an account if you don’t already have one, at https://console.cloud.google.com/.

Once you are logged in, click on the project picker indicated below.
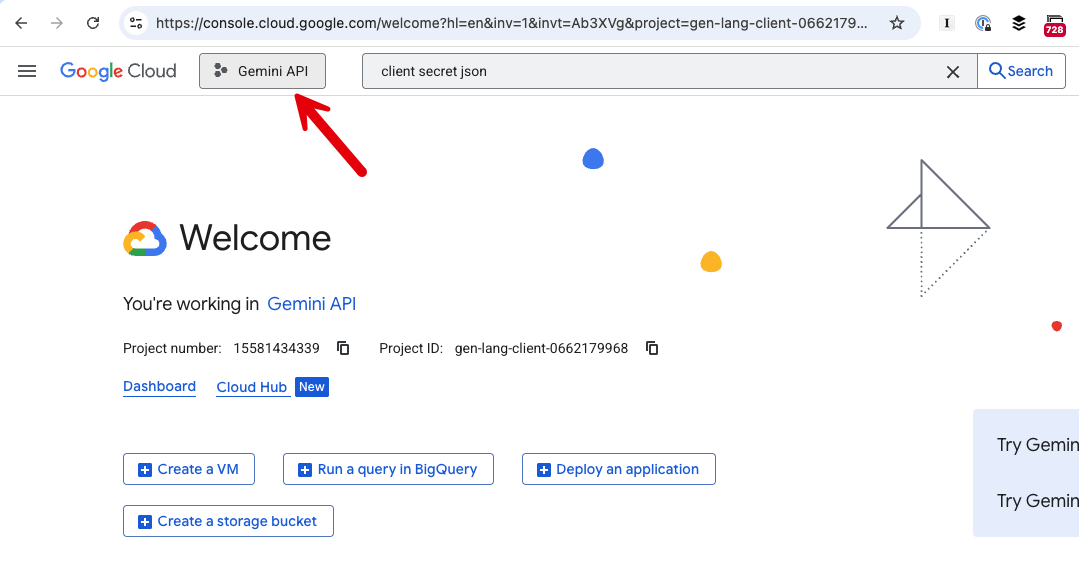
This will list the current projects for you and provide an option to create a new one.
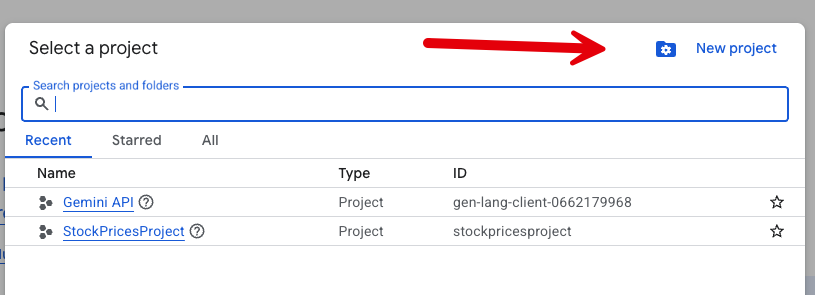
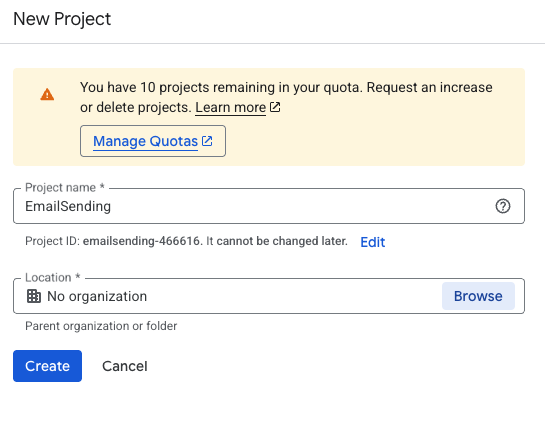
Go ahead and click that, and provide a name for your project.
Once done, click on APIs & Services, and then Credentials.
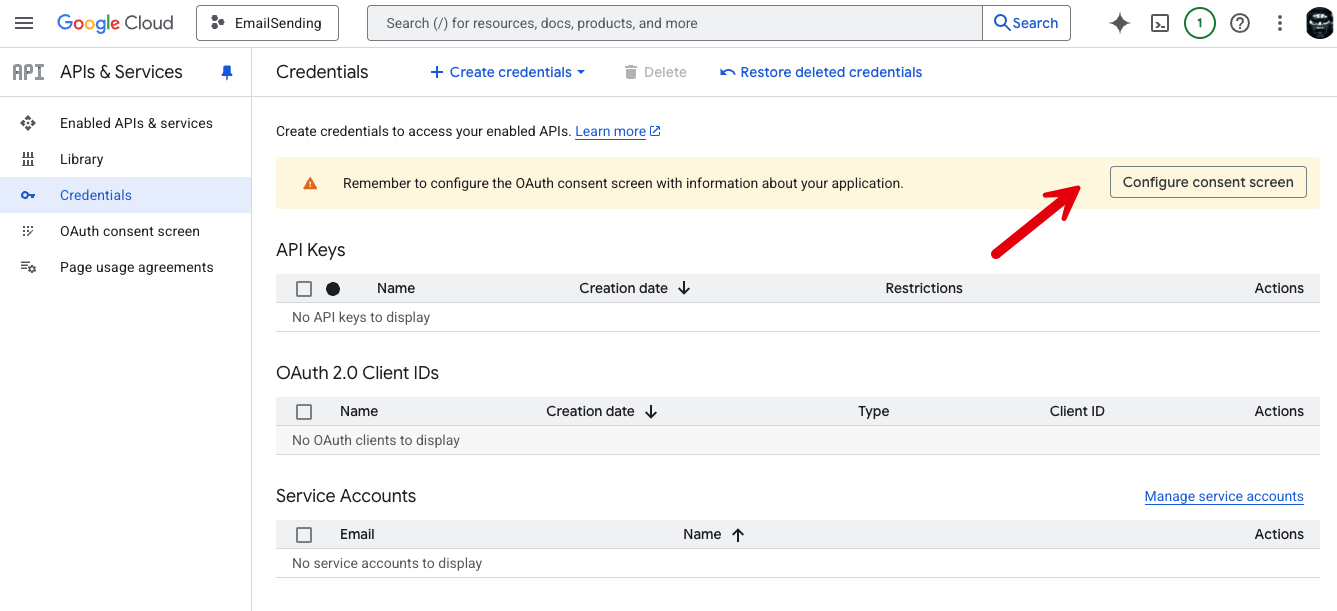
You will see a message on configuring the consent screen.
Click on that.
You will be taken to a screen to configure the Google Auth platform.
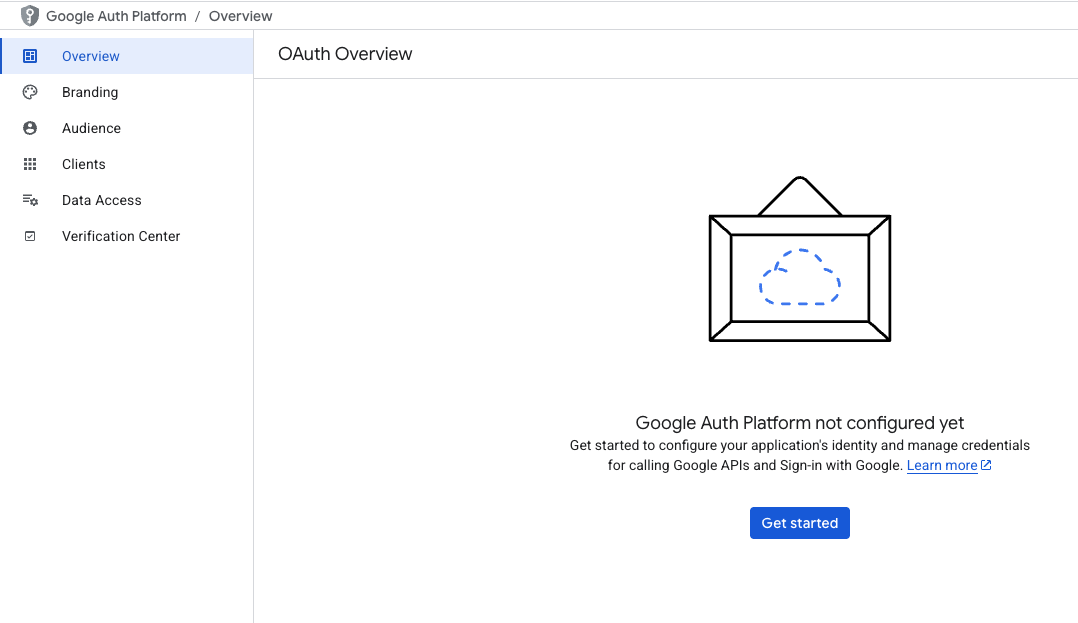
First, give your app a name, and provide a support email.

Next, specify your audience.

For consumer Gmail accounts, you must choose external. But if you have a Google Workspace account, you can choose either.
Finally specify your contact information.

The next step is to create an Oauth Client.
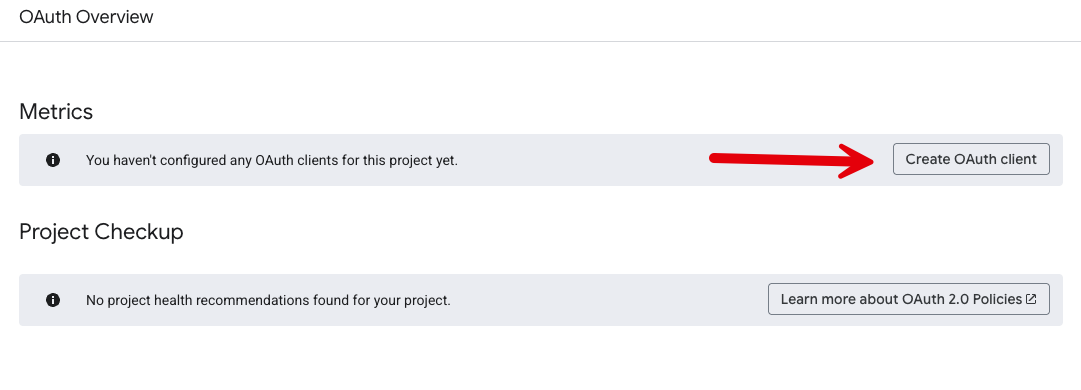
Click on the button and you will be taken to this screen:
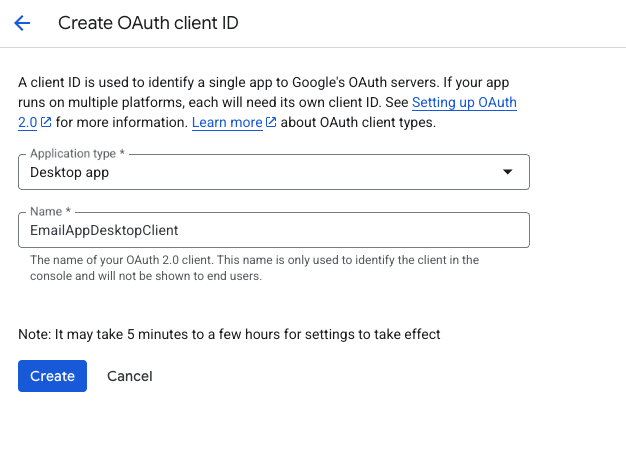
The name is anything you want, but the application type for our example is Desktop app.
On completion, you should see your client listed.

Next, navigate to APIs & Services > Enabled APIs & Services.
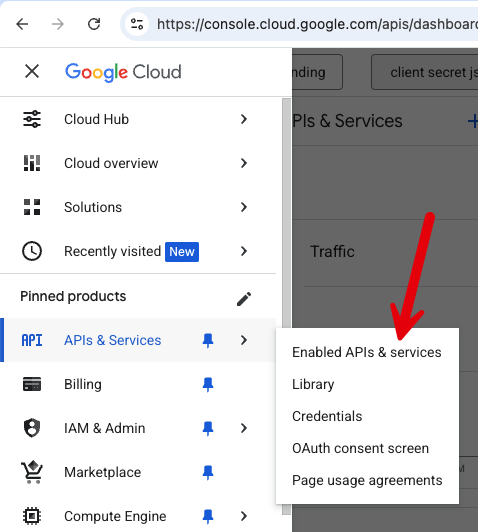
This will take you to a screen with an option to Enable APIs and services.

From here, search for Gmail
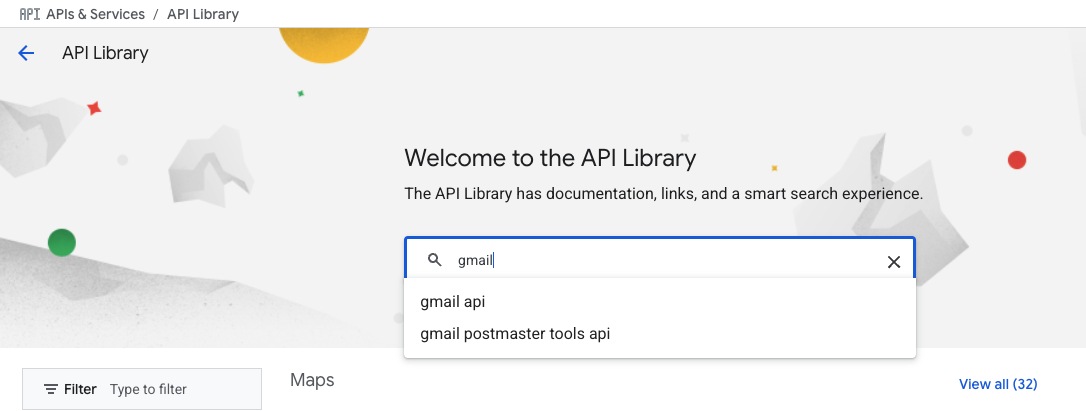
You should see a result screen listing the matches.

Click on Gmail API.
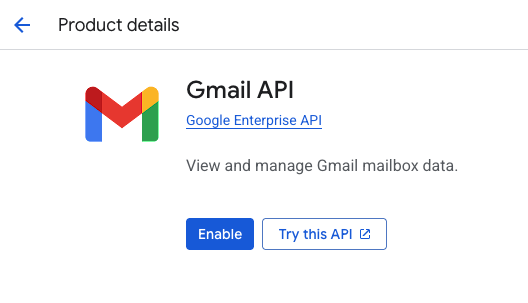
From here you can click Enable so that this API is available to your project.
Finally, we need to configure the audience allowed to access this API.
The top of the screen has a search box

Type audience and then search.
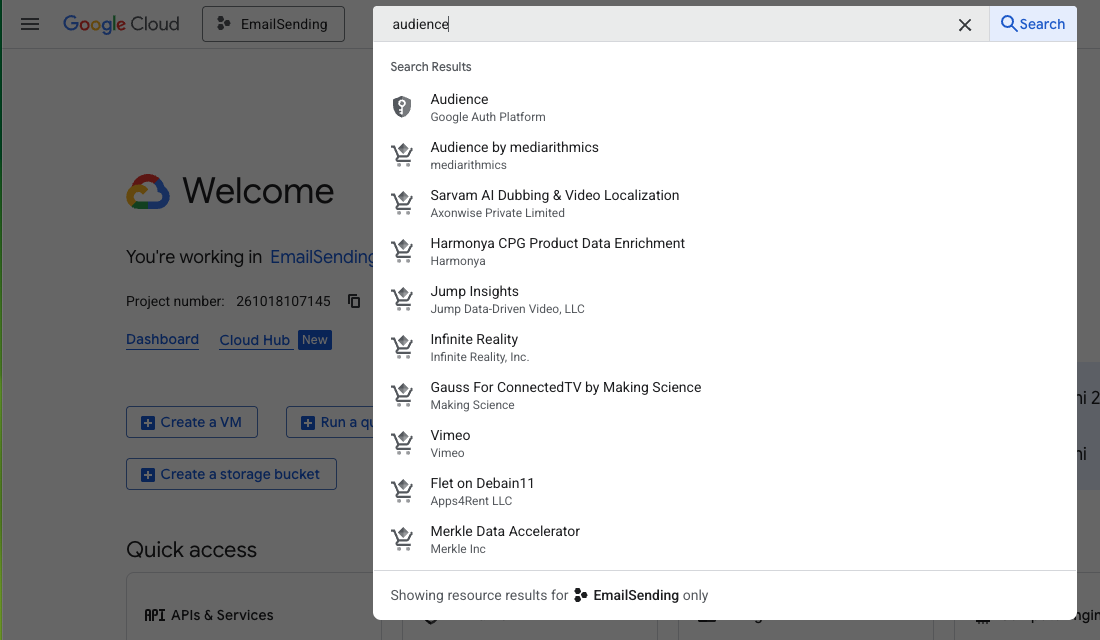
Select the first result, and scroll down to Test Users.
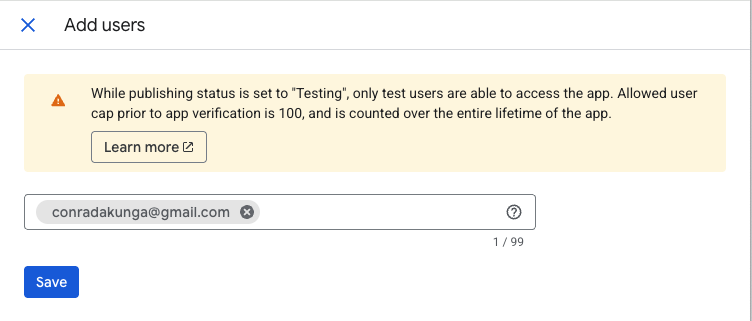
From here, click Add users.
You will have to add yourself here, so that Google will allow you to access the application and APIs.
Finally, we can write the code to send the email.
You will need two packages from Google - Google.Apis.Gmail.v1 and Google.Apis.Auth
dotnet add package Google.Apis.Auth
dotnet add package Google.Apis.Gmail.v1
To make it easier to manipulate some of the lower level constructs, we use the MimeKit library
dotnet add package MimeKit
Next, you will need to create a JSON file that contains the parameters required to authenticate your application. This file will be in the root of your project.
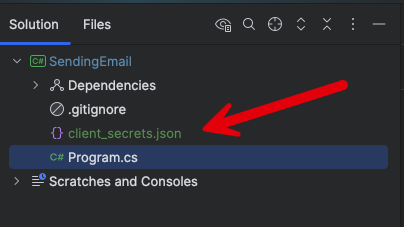
The file is structured as follows:
{
  "installed": {
    "client_id": "YOUR-CLIENT-ID",
    "project_id": "YOUR-PROJECT_ID",
    "auth_uri": "https://accounts.google.com/o/oauth2/auth",
    "token_uri": "https://oauth2.googleapis.com/token",
    "auth_provider_x509_cert_url": "https://www.googleapis.com/oauth2/v1/certs",
    "client_secret": "YOUR-CLIENT-SECRET",
    "redirect_uris": [
      "urn:ietf:wg:oauth:2.0:oob",
      "http://localhost"
    ]
  }
}
Replace as appropriate, and save the file as client_secrets.json.
To ensure that this file is copied to the build folder, add the following XML tag to the .csproj.
<ItemGroup>
    <None Update="client_secrets.json">
        <CopyToOutputDirectory>Always</CopyToOutputDirectory>
    </None>
</ItemGroup>
It should now look like this:
<Project Sdk="Microsoft.NET.Sdk">
    <PropertyGroup>
        <OutputType>Exe</OutputType>
        <TargetFramework>net9.0</TargetFramework>
        <ImplicitUsings>enable</ImplicitUsings>
        <Nullable>enable</Nullable>
    </PropertyGroup>

    <ItemGroup>
        <PackageReference Include="Google.Apis.Auth" Version="1.70.0"/>
        <PackageReference Include="Google.Apis.Gmail.v1" Version="1.70.0.3833"/>
        <PackageReference Include="MimeKit" Version="4.13.0"/>
    </ItemGroup>
    <ItemGroup>
        <None Update="client_secrets.json">
            <CopyToOutputDirectory>Always</CopyToOutputDirectory>
        </None>
    </ItemGroup>
</Project>
Finally, we write the code that sends the email.
using System.Text;
using Google.Apis.Auth.OAuth2;
using Google.Apis.Gmail.v1;
using Google.Apis.Gmail.v1.Data;
using Google.Apis.Services;
using MimeKit;

// Setup our parameters
const string applicationName = "EmailAppDesktopClient";
const string fromAddress = "conradakunga@gmail.com";
const string toAddress = "cakunga@innova.co.ke";

try
{
    // Set our desired scopes
    var scopes = new[] { GmailService.Scope.GmailSend };

    // Read our credentials from JSON
    UserCredential credential;
    await using (var stream = new FileStream("client_secrets.json", FileMode.Open, FileAccess.Read))
    {
        credential = await GoogleWebAuthorizationBroker.AuthorizeAsync(GoogleClientSecrets.FromStream(stream).Secrets,
            scopes, "user", CancellationToken.None
        );
    }

    // Initialize the service
    var service = new GmailService(new BaseClientService.Initializer
    {
        HttpClientInitializer = credential,
        ApplicationName = applicationName
    });

    // Create a MIME message
    var email = new MimeMessage();
    email.From.Add(new MailboxAddress(fromAddress, fromAddress));
    email.To.Add(new MailboxAddress(toAddress, toAddress));
    email.Subject = "Test Subject";
    email.Body = new TextPart("plain")
    {
        Text = "Test Email"
    };

    // Encode the message
    using var memoryStream = new MemoryStream();
    email.WriteTo(memoryStream);
    var rawMessage = Convert.ToBase64String(memoryStream.ToArray())
        .Replace('+', '-').Replace('/', '_').Replace("=", "");

    // Create a message
    var message = new Message
    {
        Raw = rawMessage,
    };

    // Send the message
    await service.Users.Messages.Send(message, "me").ExecuteAsync();

    Console.WriteLine("Message sent");
}
catch (Exception ex)
{
    Console.WriteLine(ex.Message);
}
If we run the code, your browser will open with an OAUTH prompt:
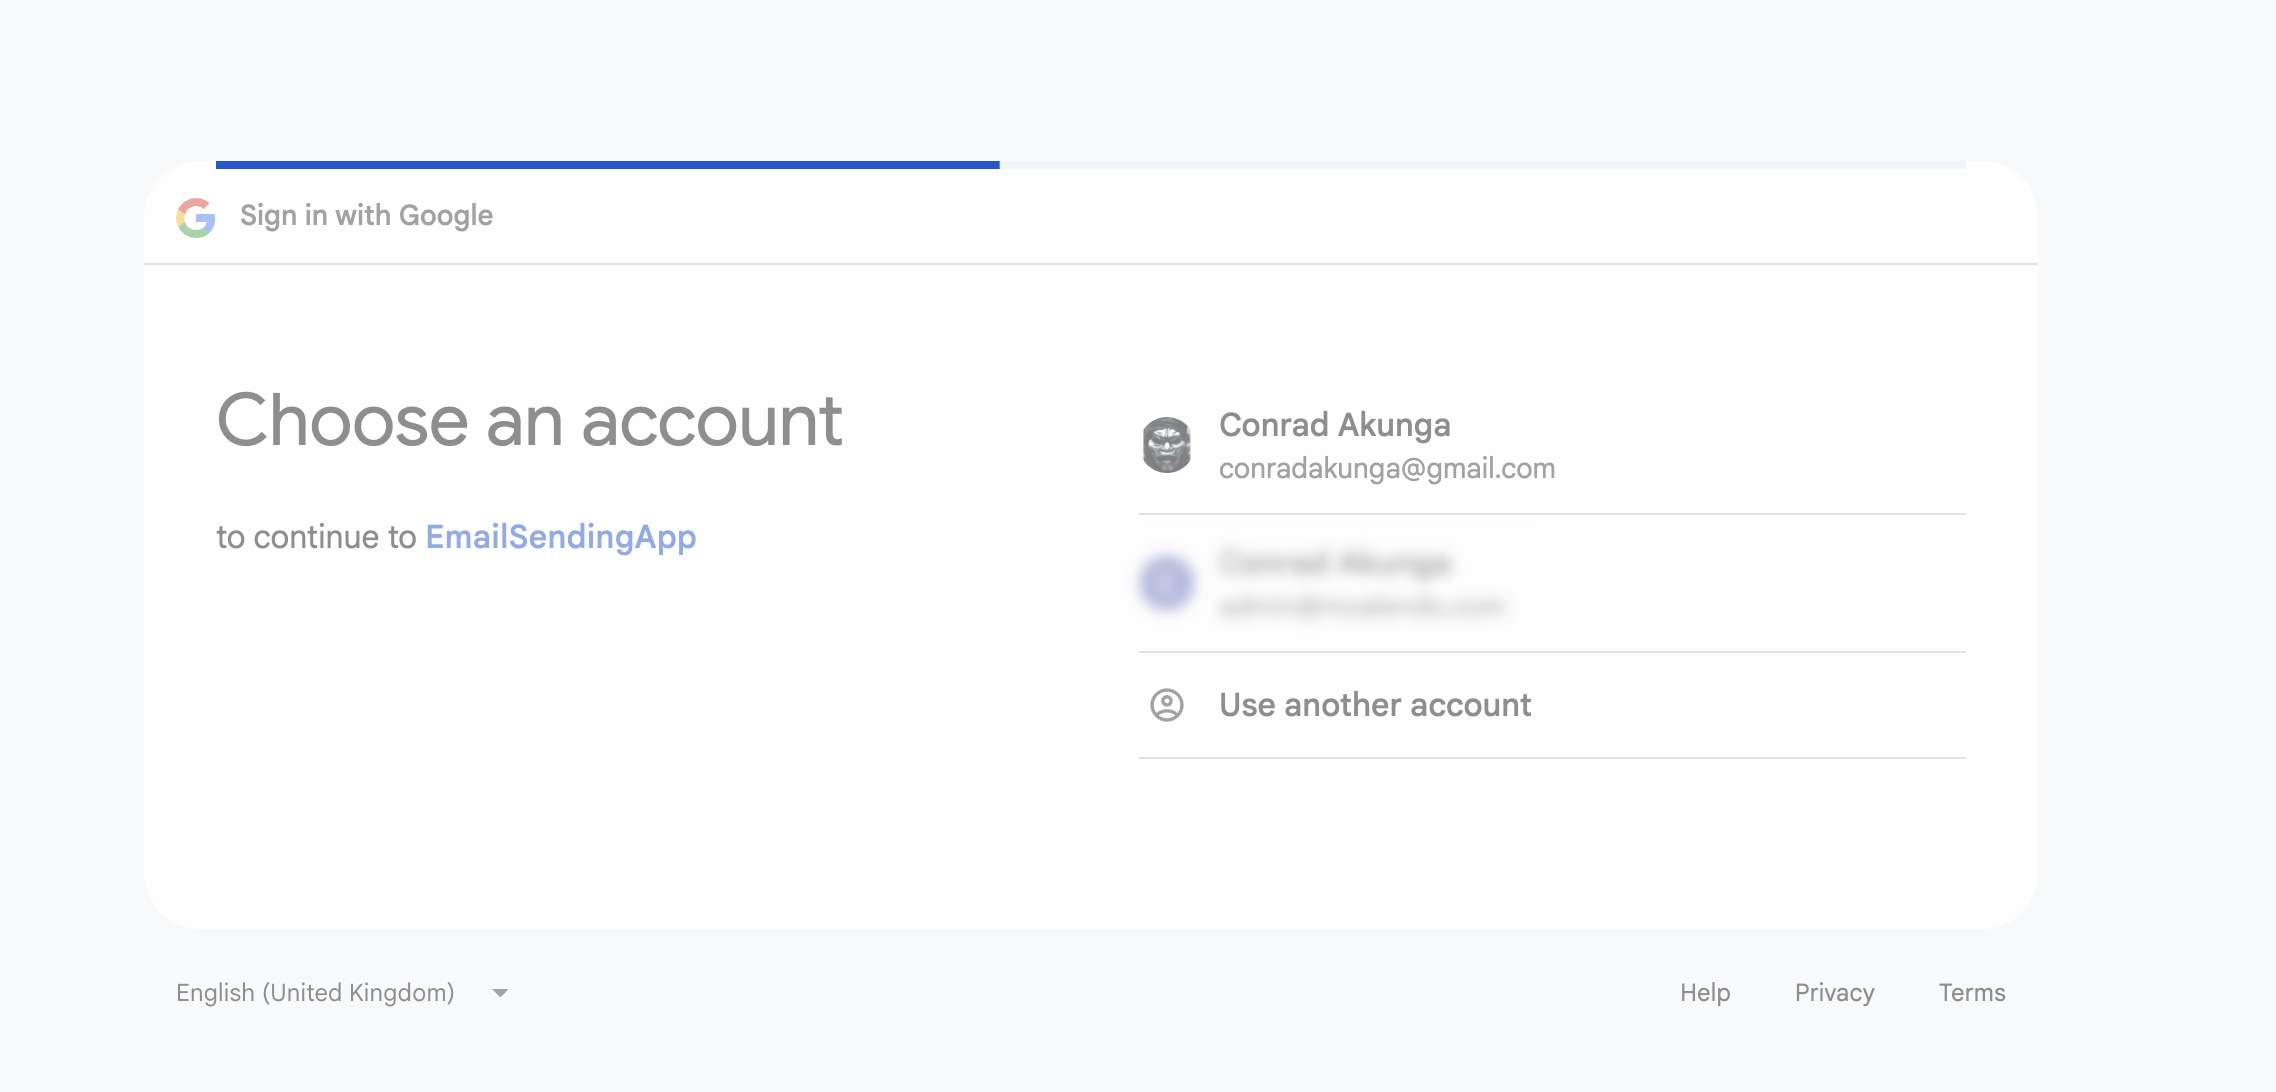
Select the account that you added earlier to Test Users, or login with that account.
You will get this second screen:
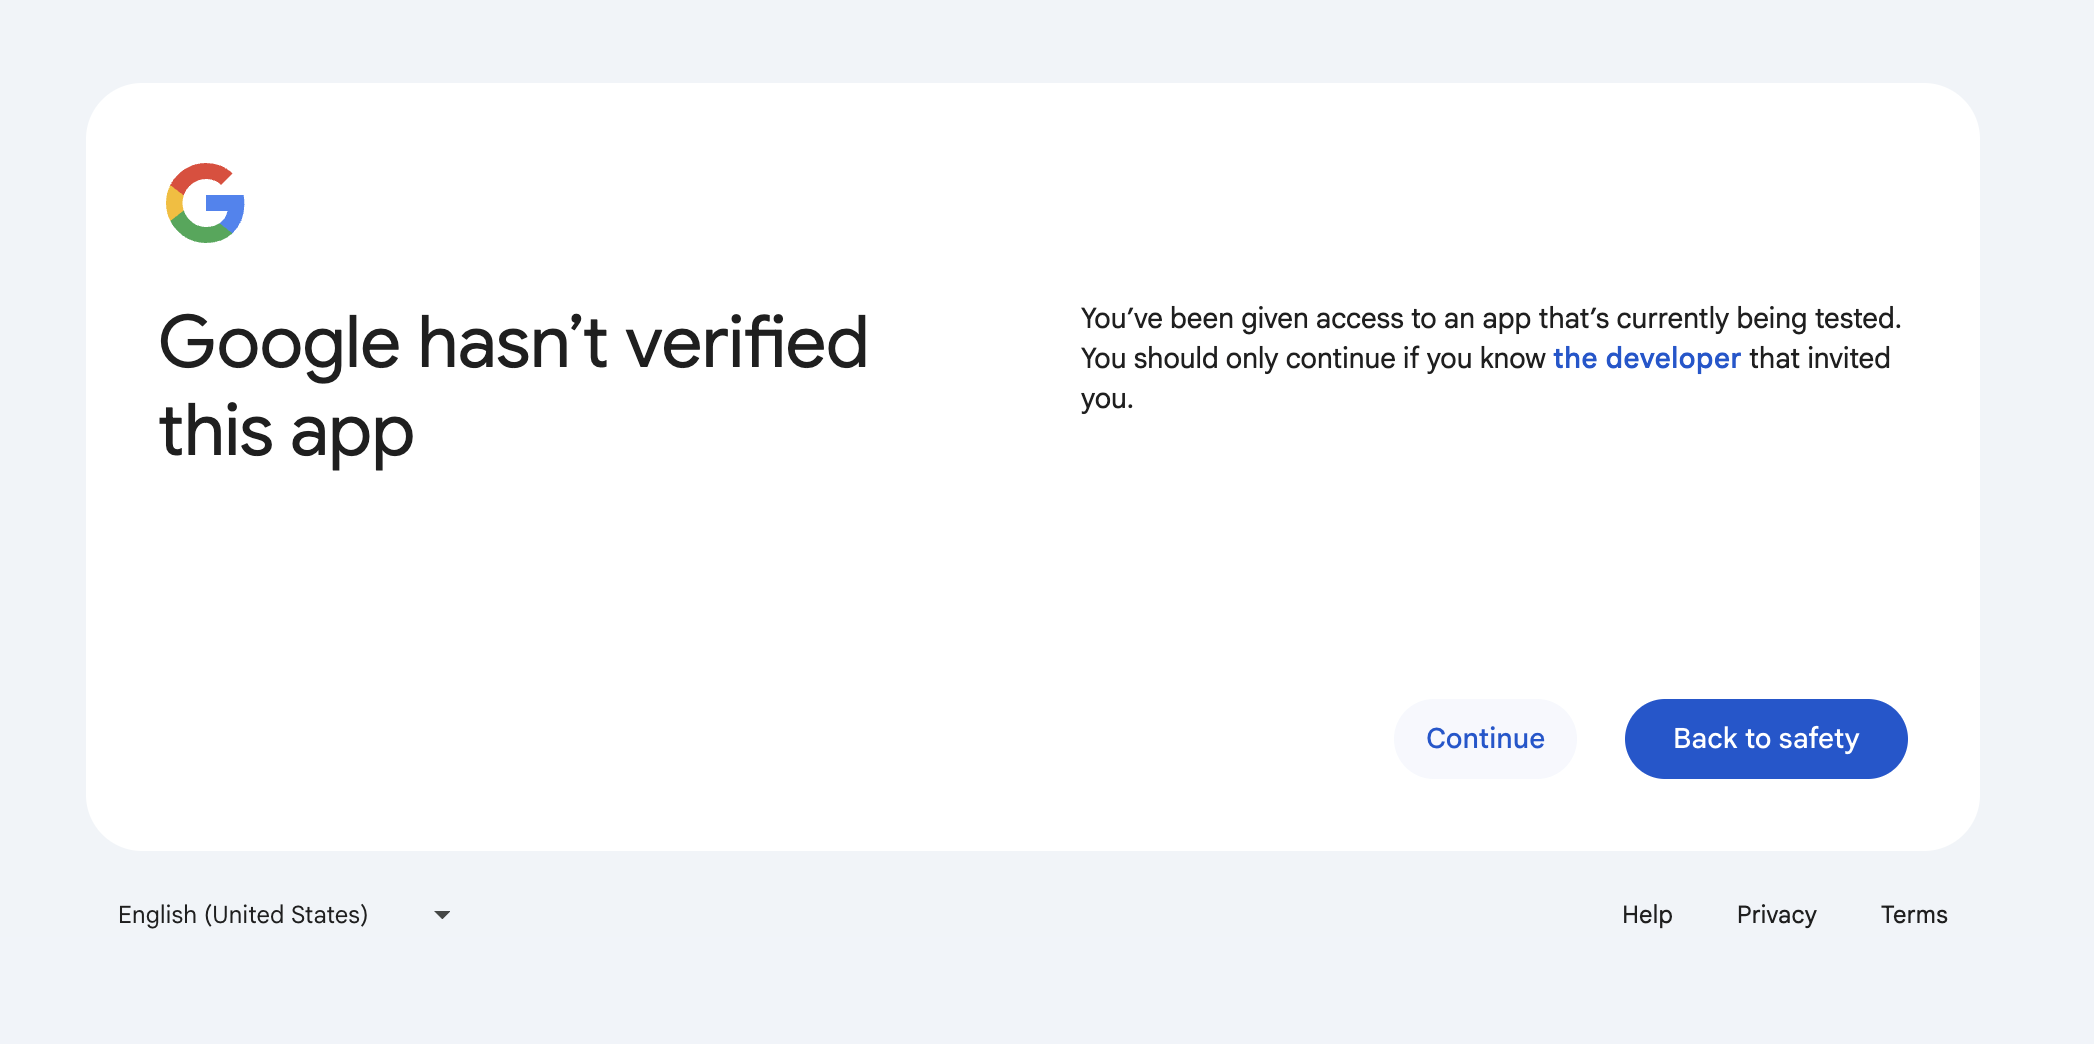
Click continue.
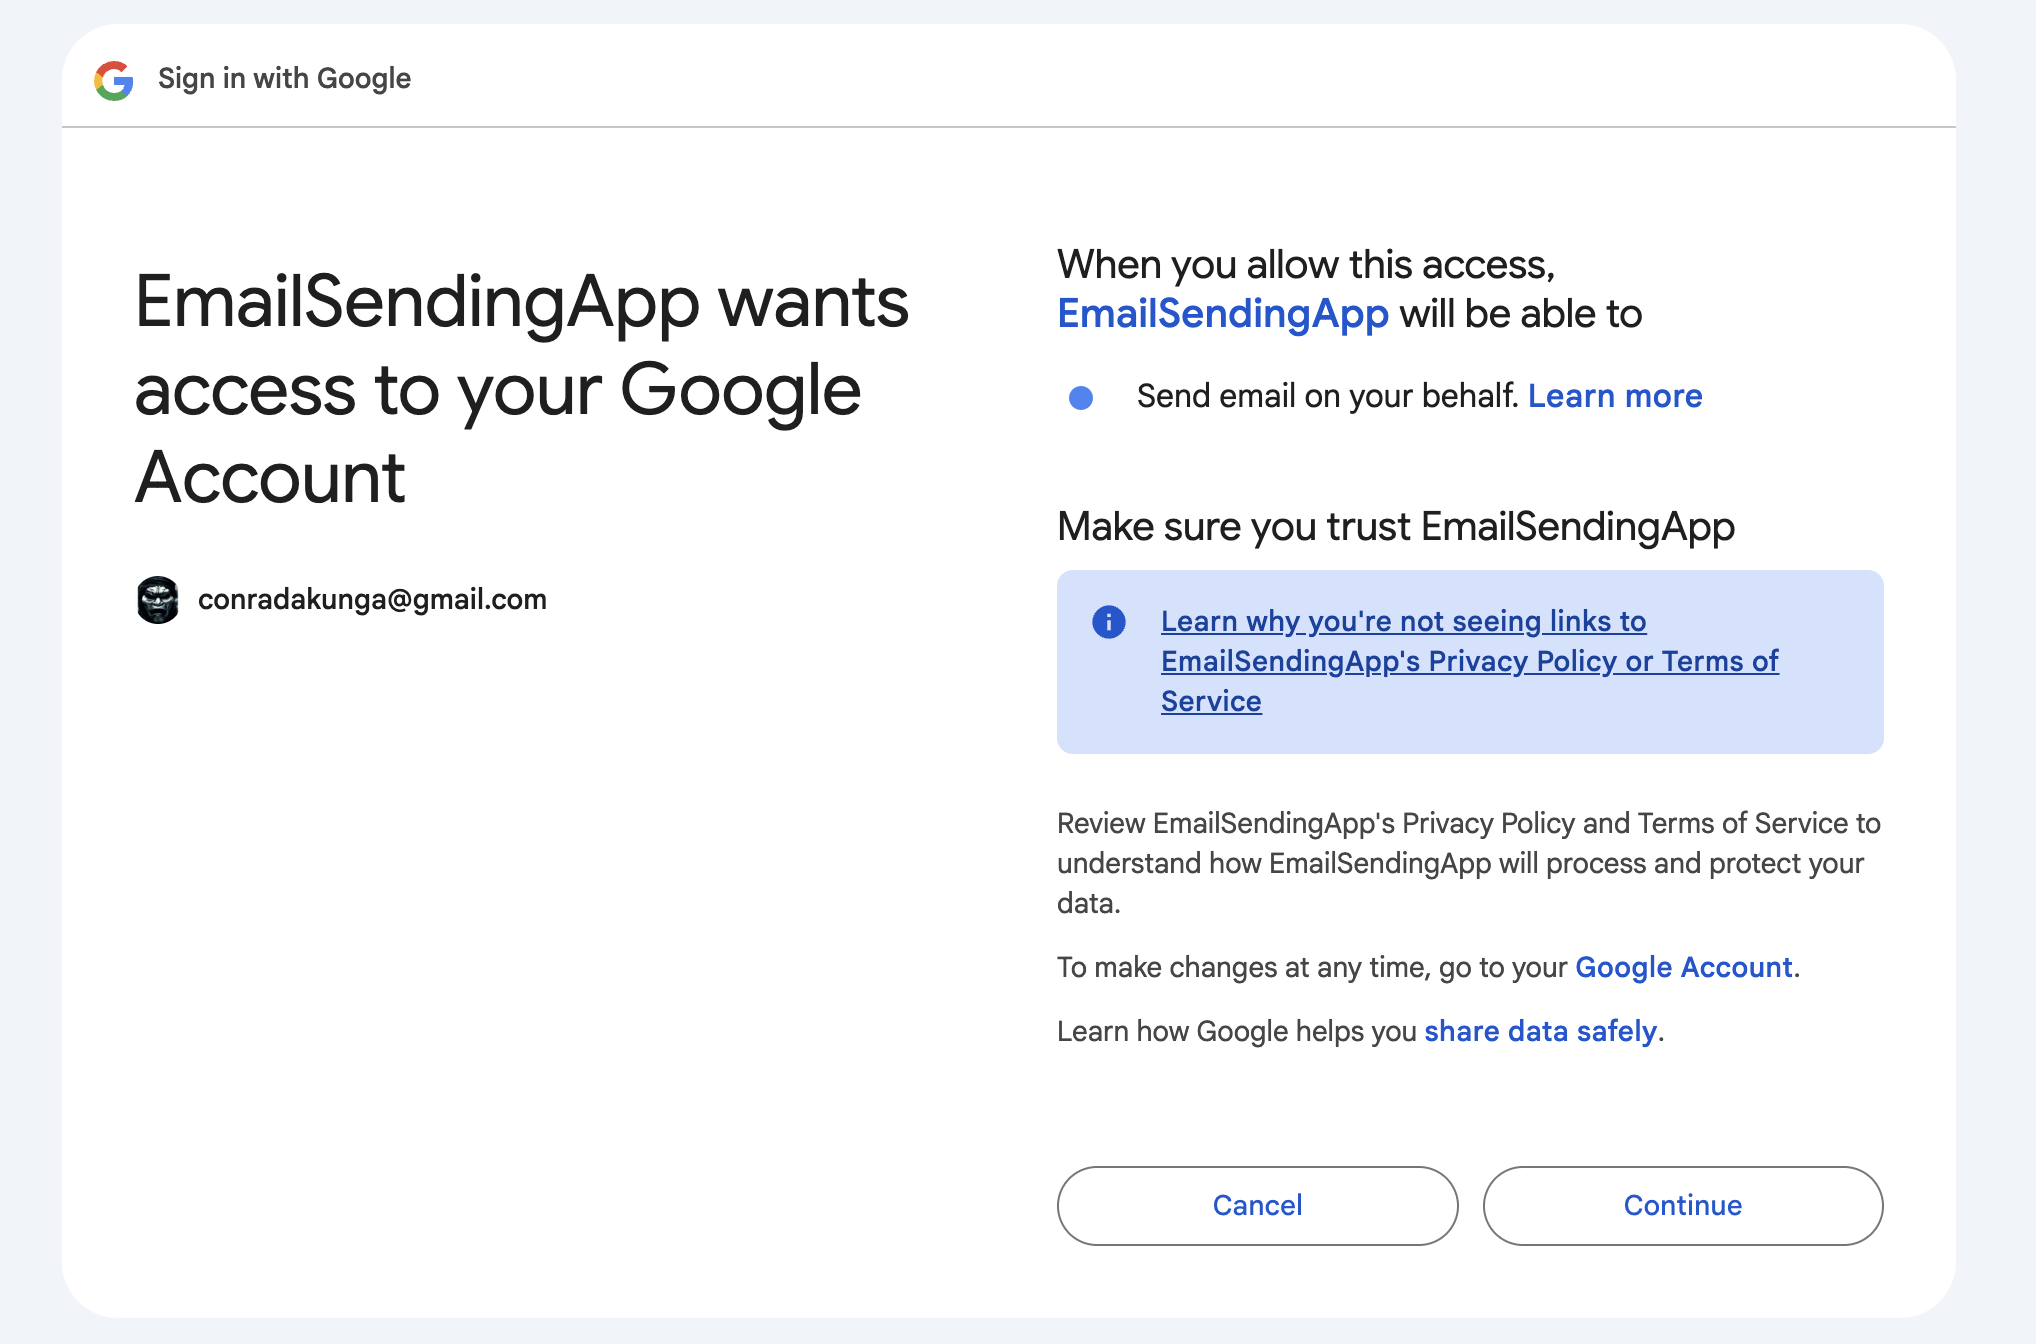
The next screen is a confirmation of the requested security scope - sending email.
Click continue.
The final screen will inform you that your application is now authenticated and authorized.

Your email should now be sent.
"/Users/rad/Projects/BlogCode/2025-07-21 - Sending Via Google Cloud/bin/Debug/net9.0/SendingEmail"
Message sent

Process finished with exit code 0.
As with all the other messaging APIs, there are throttling limits in place to prevent abuse. You can read the limits here.
In the next post, we will look at how to test SMTP email delivery locally.
TLDR
You can also use the Google Cloud APIs to send email and access additional Gmail functionality.
The code is in my GitHub.
Happy hacking!